- Licensed CA Contractor·
- ADA Compliant Installs·
- Serving All of Southern California·
- Free Estimates·
- Licensed, Bonded & Insured
The Epoxy Floor Installation Process, Step by Step
What happens before, during and after an epoxy installation, and why each step protects the finished floor.
Quick answer
An epoxy floor installation follows a fixed order: inspect and test the slab, grind the surface, repair cracks, apply primer, build the epoxy layers, add color or flake, then seal with a topcoat and let it cure. Skipping or rushing any step is the main reason floors peel. Turbo Surfacing is licensed, bonded and insured.
Key takeaways
- Prep and moisture testing come first.
- Each coat needs its own cure time.
- Topcoat choice controls wear and gloss.
- A written schedule shows when the floor is ready.
Most epoxy failures trace back to the first day, not the last. A floor that was ground properly, tested for moisture and given time to cure between coats will outlast one that was rushed.
This page walks through the process in the order it happens, so you can plan your space and judge any bid you receive.
The site walk and written scope
Every project starts with a visit. We measure the area, look at the condition of the slab, note old coatings, oil stains, cracks and drains, and ask how the floor will be used. Garage floors, kitchens, shops and showrooms all need different systems.
After the visit you receive a written scope listing the products, the number of coats, the finish and the surface prep. Reading that scope closely is the best way to compare contractors, because two bids that look alike on price can describe very different work.
Testing the slab before anything is applied
We check the concrete before we choose a product. A moisture test shows whether vapor is rising through the slab, and a water drop test reveals old sealers that block adhesion. We also tap the surface to find hollow spots and look for signs of past leaks.
These tests decide the primer and the system. A slab with high vapor needs a moisture tolerant primer, while a clean, dry slab can take a standard one. Testing costs little compared with redoing a peeling floor.
Diamond grinding and surface profile
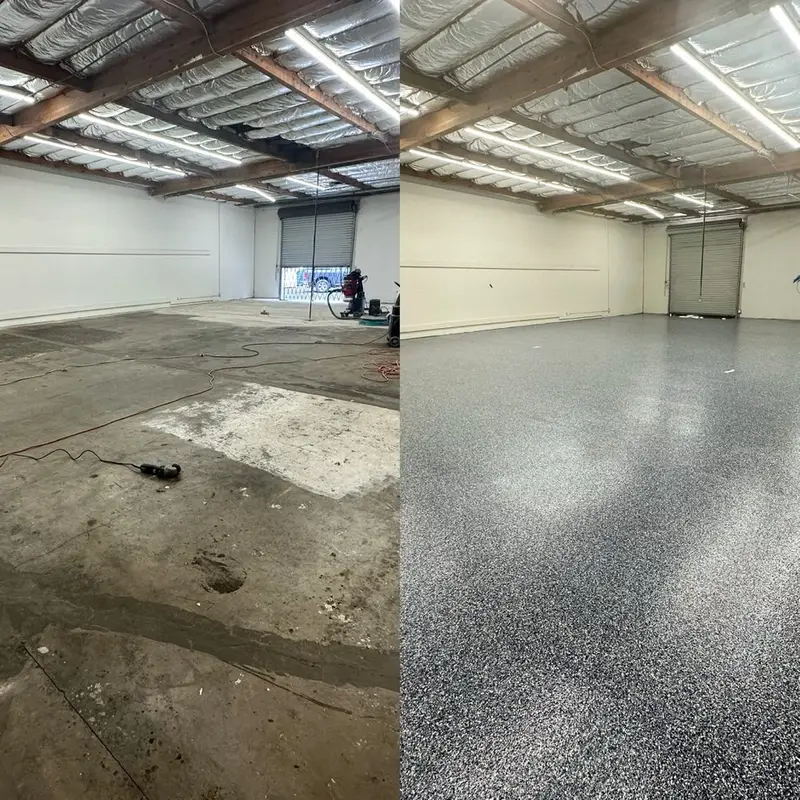
Epoxy bonds to a roughened surface, not a smooth one. We use diamond grinders with dust extraction to open the pores of the concrete and remove laitance, paint, glue and weak material. Edges and corners are finished with hand grinders.
Acid etching is not a substitute. Grinding gives a consistent profile across the whole floor, and the vacuum system keeps dust out of the air and off your belongings. We vacuum the slab again before any material goes down.
Crack, joint and pit repair
Cracks, spalls and pitted areas are repaired before coating, because epoxy will telegraph through anything left behind. We vee cracks, fill them with a rigid repair material and grind them flush. Control joints are treated according to whether they move.
Large holes are patched with a repair mortar. Small surface pits can be skim coated so the final floor looks smooth. We explain which repairs will stay visible and which will disappear under the finish.
Primer and bonding
The primer soaks into the ground concrete and creates the bond between slab and coating. It also seals pores so air does not rise through the epoxy and cause pinholes. We mix by measured ratio, apply with rollers and squeegees and watch the cure window closely.
Spot priming and a second pass are sometimes needed on thirsty slabs. The next coat goes down only when the primer is ready, not on a rigid schedule.
Building the epoxy layers
Depending on the system, we apply a base coat, a body coat or a thicker mortar layer. Solid color epoxy is squeegeed and back rolled to an even film. Chip and quartz systems add a broadcast of decorative media into the wet coat, while metallic systems are worked with tools to create movement.
Thickness matters. We measure what goes on, because a thin film wears quickly while a properly built system handles tires, carts and impacts.
Flake, quartz and metallic details
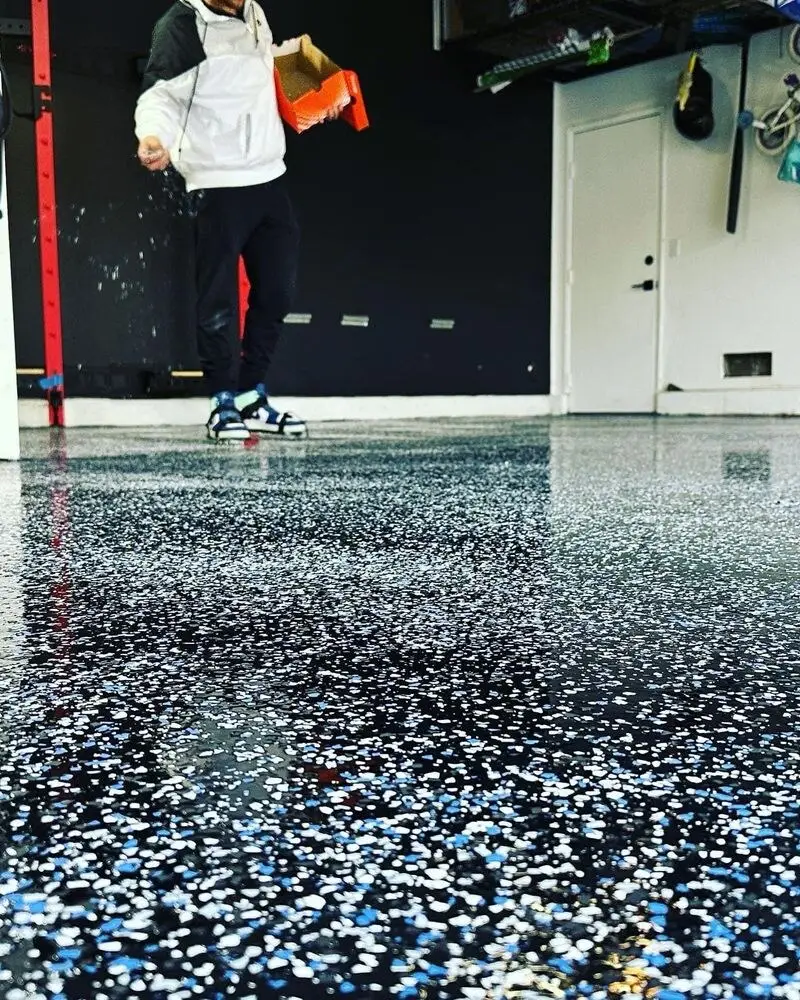
When decorative media is used, it is thrown into the wet base coat until the surface is fully covered. After curing, the excess is scraped and vacuumed away, leaving a textured, forgiving surface that hides dirt and small marks.
Metallic pigments need a steadier hand. We pour, move and tool the material, then check for pooling before it sets. Samples are shown in advance so you can see how color and movement will look in your lighting.
Topcoats and finish choices
The topcoat protects against abrasion, chemicals and ultraviolet light. Polyaspartic and urethane topcoats resist scratching and keep color stable, while a plain epoxy topcoat suits interiors without sun exposure. Gloss can be high, satin or matte.
For traction in wet areas we add fine aggregate to the final coat. We test a small area so you can feel the texture before committing the whole floor.
Cure times and returning to use
Epoxy gains strength gradually. Light foot traffic is usually fine after the first day, light vehicles after a longer wait and heavy loads or chemicals after the full cure. Temperature and humidity change these windows, so we give you a written schedule for your project.
Keep water, pets and furniture off the floor until we say it is ready. Fresh epoxy can mark easily during the first days, and patience here protects the finish.
Southern California conditions
Coastal moisture, inland heat and Santa Ana winds each affect epoxy differently. Damp air can cloud a finish, while hot slabs shorten working time and raise the risk of bubbles. We watch slab and air temperatures and avoid applying in direct sun or on warm concrete.
Garage doors are opened or closed to control airflow, and sometimes the schedule shifts by a few hours to catch better conditions. This is routine planning, not a delay.
Protecting your space during the work
We mask walls, cabinets, doors and fixtures, run dust extraction during grinding and keep vapors ventilated. Vehicles, storage and equipment are moved or covered before work starts, and we agree in advance on where items will go.
For businesses, we phase work by zone so part of the space stays open. Nights and weekends are common, and we confirm access, parking and security before the crew arrives.
Final walkthrough and punch list
When the floor is finished, we walk it with you in good light. We look for missed spots, uneven gloss, debris in the finish and edges that need touch ups. Anything that needs attention is noted and corrected.
You receive care instructions, a list of products used and the cure schedule. If questions come up later, that record helps us answer quickly.
How long the process takes
A typical garage takes two to four days from grinding to a floor you can walk on, depending on the system and conditions. Larger commercial floors are scheduled in phases. Multi layer systems take longer than a single coat, and moisture or repairs add time.
We would rather tell you the real timeline up front than promise something short and cut corners. The written schedule shows each stage and when your space returns to use.
Questions worth asking any contractor
Ask how the slab will be prepared, whether moisture will be tested, how many coats are included and what the topcoat is. Ask what happens if a section fails early, and who handles repairs. Plain answers, put in writing, are a good sign.
We are glad to answer all of these before you sign, and we put the answers in your scope so nothing depends on memory.
Getting an estimate
Our epoxy floor cost guide explains what moves the price. Send photos and rough dimensions through the free estimate form and we respond within 24 hours. Site walks are available the next day or later, depending on availability, and you receive a written scope after the visit.
What to know before you start
Set a documented review point after preparation but before primer application. It is the last practical opportunity to record exposed repairs that the coating sequence will cover.
Frequently Asked Questions
Sources
Last reviewed:
By Turbo Surfacing Solutions team · Planning updated:
KEEP EXPLORING.
Other Southern California surfacing projects we specialize in — handpicked because they share the same materials, standards, or installation crew as this page.
Related Epoxy & Concrete Polishing & Resources
Sibling services, cities where we install this, and blog posts that go deeper.
Get a Quote for Epoxy Installation Process
Get a free, no-obligation estimate for your project. Our team responds within 24 hours.
Get Epoxy Quote